Sonobe Origami Polyhedra – Activity Directions
The procedure presented on this page was invented in the 1960s and is attributed to Mitsunobu Sonobe. (See the references for more about the origin of the Sonobe module.)
For a photographic version of the steps diagrammed below, see Stephan Lavavej's website. His page also has photos showing how to put the modules together to make a cube, a stellated octahedron, and a stellated icosahedron. Here is a picture of one of Stephan's Epcot balls (also known as a geodesic dome).
Sonobe Module Instructions
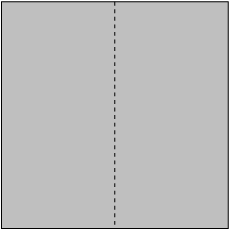
Crease paper down the middle and unfold
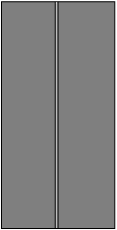
Fold edges to center line and unfold
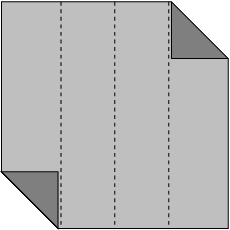
Fold top right and bottom left corners -- do not let the triangles cross the crease lines.
If you fold the top left and bottom right corners instead, the pieces you end up with will have a different chirality (handedness) than the ones I show here. This is not a problem as long as you make ALL your modules the same way. Right-handed and left-handed pieces will not fit together.
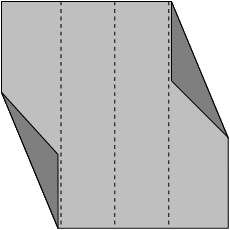
Fold triangles down to make sharper triangles -- do not cross the crease lines
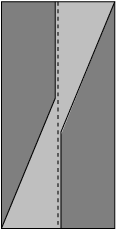
Fold along vertical crease lines
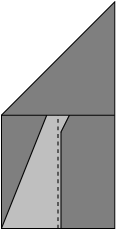
Fold top left corner down to right edge
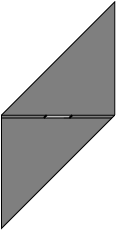
Fold bottom right corner up to left edge
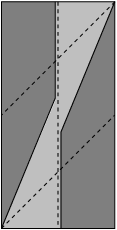
Undo the two previous folds
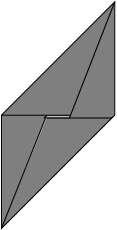
Tuck the upper left corner under the flap on the opposite side. Repeat for the lower right corner.


Turn the paper over, crease along dashed lines to form a square, and reopen to complete the module.
NOTE: Following the instructions in this step will allow you to make a cube, but some Sonobe polyhedra require one or both of these creases to go the other direction. Also, some Sonobe polyhedra require an additional crease (in one direction or the other) along the diagonal that runs from the upper left corner to the lower right corner in the diagrammed square.
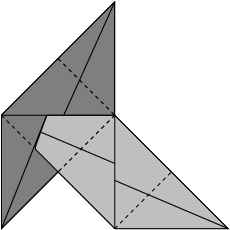
Triangular flaps of one module fit into pockets of another module
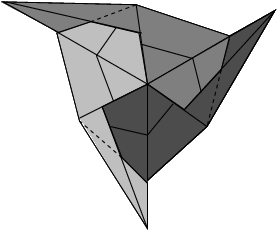
A cube requires six modules
You can make many different types of polyhedra with Sonobe units if you modify the creases in Step 10 appropriately. Just remember that both triangular flaps of every unit should fit into pockets of other units.

